

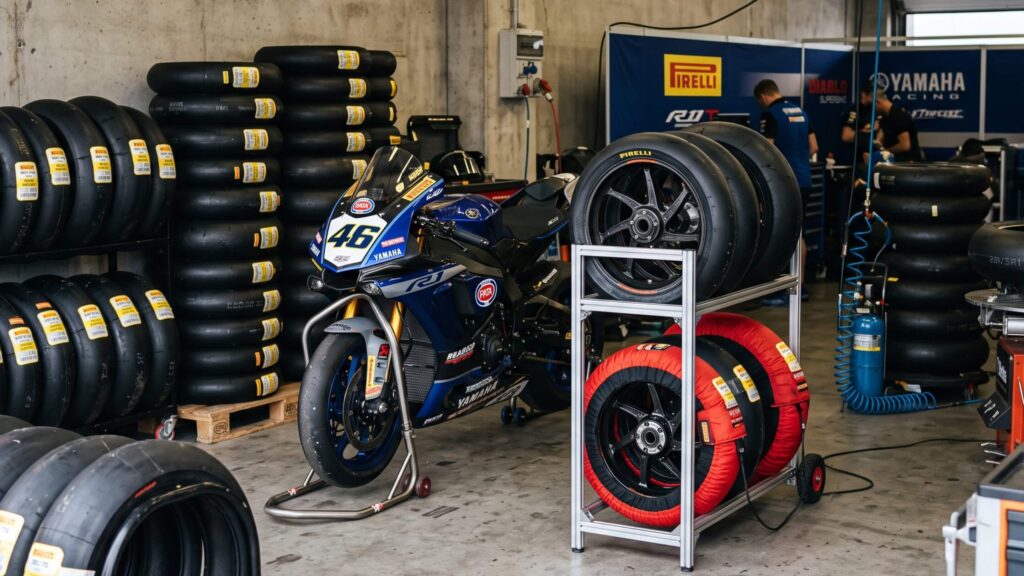
Pirelli is one of the leading manufacturers of dedicated track tires – but choosing the right slick isn’t just about the circuit, riding style, or motorcycle. The correct rim width is the key factor. Especially on trackdays, proper fitment is crucial: only when tire width, profile, and rim size work together do slicks deliver their full grip potential, provide clean feedback, and remain stable at the limit.
This fitment guide gives you a clear overview of which Pirelli slicks fit which rims, which combinations make technical sense, and where common mistakes occur. It offers precise, practical guidance to help you select the optimal tire setup – tailored specifically for high‑performance track use.
Table of Contents
You can find all Slick tyres here in our shop…
Why the correct tire size for each rim is crucial
The rim width fundamentally determines how a tire shapes itself, how large its actual contact patch becomes, and how stable it behaves under load. A slick only performs optimally when its construction matches the rim exactly. Even a deviation of 0.5 inches can noticeably change the bike’s handling. Fitment is therefore, alongside tire pressure, one of the most important factors for racing slicks.
What happens with the wrong combination?
Rim too narrow for a wide tire The tire becomes “compressed.” The profile turns rounder, the contact patch becomes smaller. → Result: Less stability under braking, vague turn‑in, unsettled feedback.
Rim too wide for a narrow tire The tire gets “stretched.” The profile becomes flatter, the sidewall over‑extended. → Result: Heavier, less agile handling, higher temperature peaks.
Both scenarios lead to the slick not working as Pirelli designed it — resulting in loss of grip, stability, and consistency over multiple laps.
5.5‑inch rear rim – typical Supersport
The 5.5‑inch rim is standard in the 600cc Supersport segment. It is designed for:
- 180/60 slicks (classic Supersport size)
- 190/60 slicks (modern alternative with a larger contact patch)
A 200 slick often appears too round on a 5.5‑inch rim, builds less surface area, and loses stability during hard acceleration. For most 600cc bikes, a 180 or 190 is the technically cleanest choice — also considering swingarm clearance.
6‑inch rear rim – typical Superbike
Superbikes almost always run a 6‑inch rim, optimized for:
- 200/60 slicks (Superbike standard)
- 200/65 slicks (modern high‑performance profile with more drive grip)
On a 6‑inch rim, a 200 slick unfolds its full profile: wide contact patch, high braking stability, and strong drive grip on corner exit. A 190, on the other hand, appears too flat on a 6‑inch rim, loses entry grip, and tends to overheat.
Quick Summary
- Supersport (5.5 inch): 180/60 or 190/60
- Superbike (6 inch): 200/60 or 200/65
Incorrect fitment costs grip, stability, and lap time. Correct fitment ensures optimal profile, clean feedback, and consistent performance.
Which slick size fits which rim: Pirelli Fitment Table
Below you will find tables for the most important Pirelli racing slicks sorted by rim fitment.
DIABLO SUPERBIKE – DRY SLICK
| Type | Size | Rim (in) | Width (mm/in) | Diameter Centre (mm/in) | Diameter Shoulder (mm/in) | Weight (kg/lbs) | Cold Pressure | Hot Pressure | Warmers |
|---|---|---|---|---|---|---|---|---|---|
| DIABLO SUPERBIKE DRY | front 100/70 R17 | 2.50 | 101 (3.98) | 580 (22.83) | 495 (19.50) | 3.2 (7.05) | 1.7/1.9 (25/28) | 1.8/2.0 (26/29) | 50 min @ 80°C |
| DIABLO SUPERBIKE DRY | rear 120/70 R17 | 3.50 | 120 (4.72) | 604 (23.78) | 501 (19.72) | 4.3 (9.5) | 1.6/1.8 (23/26) | 1.7/1.9 (25/28) | 50 min @ 80°C |
| DIABLO SUPERBIKE DRY | front 110/70 ZR17 | 2.75–3.00 | 112 (4.42) | 590 (23.22) | 497 (19.56) | 3.9 (8.6) | 2.0/2.2 (29/32) | 2.0/2.3 (29/34) | 50 min @ 80°C |
| DIABLO SUPERBIKE DRY | front 120/70 R17 | 3.50 | 120 (4.72) | 604 (23.78) | 501 (19.72) | 4.3 (9.5) | 2.1/2.2 (30/32) | 2.2/2.5 (32/36) | 50 min @ 80°C |
| DIABLO SUPERBIKE DRY | front 125/70 R17 | 3.50 | 124 (4.88) | 610 (24.02) | 508 (20.00) | 4.3 (9.5) | 1.9/2.2 (28/32) | 2.0/2.3 (29/34) | 50 min @ 80°C |
| DIABLO SUPERBIKE DRY | rear 140/70 ZR17 | 3.50–4.00 | 141 (5.55) | 628 (24.72) | 523 (20.59) | 5.0 (11.0) | 1.7/1.9 (25/28) | 1.8/2.0 (26/29) | 50 min @ 80°C |
| DIABLO SUPERBIKE DRY | rear 160/60 R17 | 4.50–5.00 | 165 (6.50) | 631 (24.84) | 521 (20.51) | 5.6 (12.4) | 1.6/1.8 (23/26) | 1.7/1.9 (25/28) | 50 min @ 80°C |
| DIABLO SUPERBIKE DRY | rear 180/55 R17 | 5.50 | 184 (8.2) | 641 (25.23) | 527 (20.75) | 5.8 (12.8) | 1.6/1.8 (23/26) | 1.7/1.9 (25/28) | 50 min @ 80°C |
| DIABLO SUPERBIKE DRY | rear 190/55 R17 | 5.50–6.00 | 195 (7.67) | 652 (25.67) | 527 (20.75) | 6.2 (13.7) | 1.6/1.8 (23/26) | 1.7/1.9 (25/28) | 50 min @ 80°C |
| DIABLO SUPERBIKE DRY | rear 180/60 R17 | 5.50–6.00 | 190 (7.48) | 656 (25.83) | 527 (20.75) | 6.5 (14.3) | 1.6/1.8 (23/26) | 1.7/1.9 (25/28) | 50 min @ 80°C |
| DIABLO SUPERBIKE DRY | rear 190/60 R17 | 5.50 | 195 (7.68) | 662 (26.06) | 530 (20.87) | 6.6 (14.6) | 1.6/1.8 (23/26) | 1.7/1.9 (25/28) | 50 min @ 80°C |
| DIABLO SUPERBIKE DRY | rear 200/60 R17 | 6.00 | 200 (7.87) | 662 (26.06) | 530 (20.87) | 6.7 (14.7) | 1.6/1.8 (23/26) | 1.7/1.9 (25/28) | 50 min @ 80°C |
| DIABLO SUPERBIKE DRY | rear 200/65 R17 | 6.00 | 202 (7.95) | 672 (26.45) | 530 (20.87) | 6.8 (14.9) | 1.6/1.8 (23/26) | 1.7/1.9 (25/28) | 50 min @ 80°C |
DIABLO SUPERCORSA V4
| Type | Size | Rim (in) | Width | Diameter Centre | Diameter Shoulder | Weight | Cold Pressure | Hot Pressure | Warmers |
|---|---|---|---|---|---|---|---|---|---|
| Dry DOT | front 110/70 ZR17 | 2.75–3.00 | 112 (4.42) | 590 (23.22) | 497 (19.56) | 3.9 (8.6) | 2.0/2.2 | 2.0/2.3 | 50 min @ 80°C |
| Dry DOT | front 120/70 ZR17 | 3.50 | 120 (4.72) | 604 (23.78) | 501 (19.72) | 4.3 (9.5) | 2.0/2.2 | 2.1/2.4 | 50 min @ 80°C |
| Dry DOT | rear 140/70 ZR17 | 3.50–4.00 | 141 (5.55) | 628 (24.72) | 523 (20.59) | 5.0 (11.0) | 1.7/1.9 | 1.8/2.0 | 50 min @ 80°C |
| Dry DOT | rear 150/60 ZR17 | 4.00 | 147 (5.78) | 616 (24.25) | 515 (20.27) | 5.0 (11.0) | 1.6/1.8 | 1.7/1.9 | 50 min @ 80°C |
| Dry DOT | rear 160/60 ZR17 | 4.50–5.00 | 165 (6.50) | 631 (24.84) | 521 (20.51) | 5.8 (12.8) | 1.6/1.8 | 1.7/1.9 | 50 min @ 80°C |
| Dry DOT | rear 180/55 ZR17 | 5.50 | 180 (7.08) | 641 (25.23) | 527 (20.75) | 5.8 (12.8) | 1.6/1.8 | 1.7/1.9 | 50 min @ 80°C |
| Dry DOT | rear 190/55 ZR17 | 5.50–6.00 | 190 (7.48) | 651 (25.63) | 528 (20.78) | 6.2 (13.7) | 1.6/1.8 | 1.7/1.9 | 50 min @ 80°C |
| Dry DOT | rear 180/60 ZR17 | 5.50 | 190 (7.48) | 656 (25.83) | 527 (20.75) | 6.5 (14.3) | 1.6/1.8 | 1.7/1.9 | 50 min @ 80°C |
| Dry DOT | rear 200/55 ZR17 | 6.00 | 200 (7.87) | 662 (26.06) | 527 (20.75) | 6.5 (14.3) | 1.6/1.8 | 1.7/1.9 | 50 min @ 80°C |
| Dry DOT | rear 200/60 ZR17 | 6.00 | 200 (7.87) | 670 (26.37) | 530 (20.87) | 6.7 (14.7) | 1.6/1.8 | 1.7/1.9 | 50 min @ 80°C |
DIABLO INTERMEDIATE
| Type | Size | Rim | Width | Diameter Centre | Diameter Shoulder | Weight | Cold Pressure | Hot Pressure | Warmers |
|---|---|---|---|---|---|---|---|---|---|
| Intermediate | front 120/70 R17 | 3.50 | 120 (4.72) | 604 (23.78) | 501 (19.72) | 4.2 (9.3) | 2.1/2.2 | 2.2/2.5 | 50 min @ 80°C |
| Intermediate | rear 200/60 ZR17 | 5.50–6.00 | 200 (7.87) | 662 (26.06) | 530 (20.87) | 6.8 (14.9) | 1.6/1.8 | 1.7/1.9 | 50 min @ 80°C |
DIABLO RAIN
| Type | Size | Rim | Width | Diameter Centre | Diameter Shoulder | Weight | Cold Pressure | Hot Pressure | Warmers |
|---|---|---|---|---|---|---|---|---|---|
| Rain | front 100/70 R17 | 2.50 | 101 (3.98) | 580 (22.83) | 495 (19.50) | 3.3 (7.27) | 1.8 | 1.9 | 30 min @ 50°C |
| Rain | rear 125/70 R17 | 3.50 | 120 (4.72) | 601 (23.66) | 504 (19.84) | 4.9 (9.26) | 1.8 | 1.9 | 30 min @ 50°C |
| Rain | front 110/70 R17 | 3.00 | 112 (4.41) | 590 (23.23) | 498 (19.60) | 3.9 (8.6) | 2.1 | 2.2 | 30 min @ 50°C |
| Rain | front 120/70 R17 | 3.50 | 120 (4.72) | 604 (23.78) | 501 (19.72) | 4.3 (9.5) | 2.3 | 2.4 | 30 min @ 50°C |
| Rain | rear 140/70 R17 | 3.50–4.00 | 140 (5.51) | 628 (24.72) | 523 (20.59) | 5.1 (11.2) | 1.9 | 2.0 | 30 min @ 50°C |
| Rain | rear 160/60 R17 | 4.50 | 172 (6.77) | 635 (25.00) | 533 (20.98) | 6.2 (13.7) | 1.9 | 2.0 | 30 min @ 50°C |
| Rain | rear 200/60 R17 | 5.50–6.00 | 200 (7.87) | 662 (26.06) | 530 (20.87) | 6.8 (14.9) | 1.9 | 2.0 | 30 min @ 50°C |
You can download the file with all fitments here…
All information is provided without any guarantee of correctness, completeness, or up‑to‑date accuracy. Use at your own discretion.
Do you have any questions? Leave a comment below!
